How to Debug Node with TypeScript in Neovim
I have been using Neovim for almost a year, and despite working with Node daily, I never actually took the time to setup the debugger in Neovim correctly 😅
A couple of days ago I finally took the time and I am very happy I did, because the simplicity of just starting the debugger on whatever script or app I have is amazing. I know I had a bit of a rough patch to set this up, so I figured I’ll write it all down for someone else, in case they are in the same boat I was not many days ago.
The Goal
There are a few goals with this guide:
- Being able to debug any TypeScript file directly (like scripts, not just apps)
- Being able to debug any TypeScript application by selecting the script to run from the
package.json
This is an example of how it could look (which we will achieve in the end):
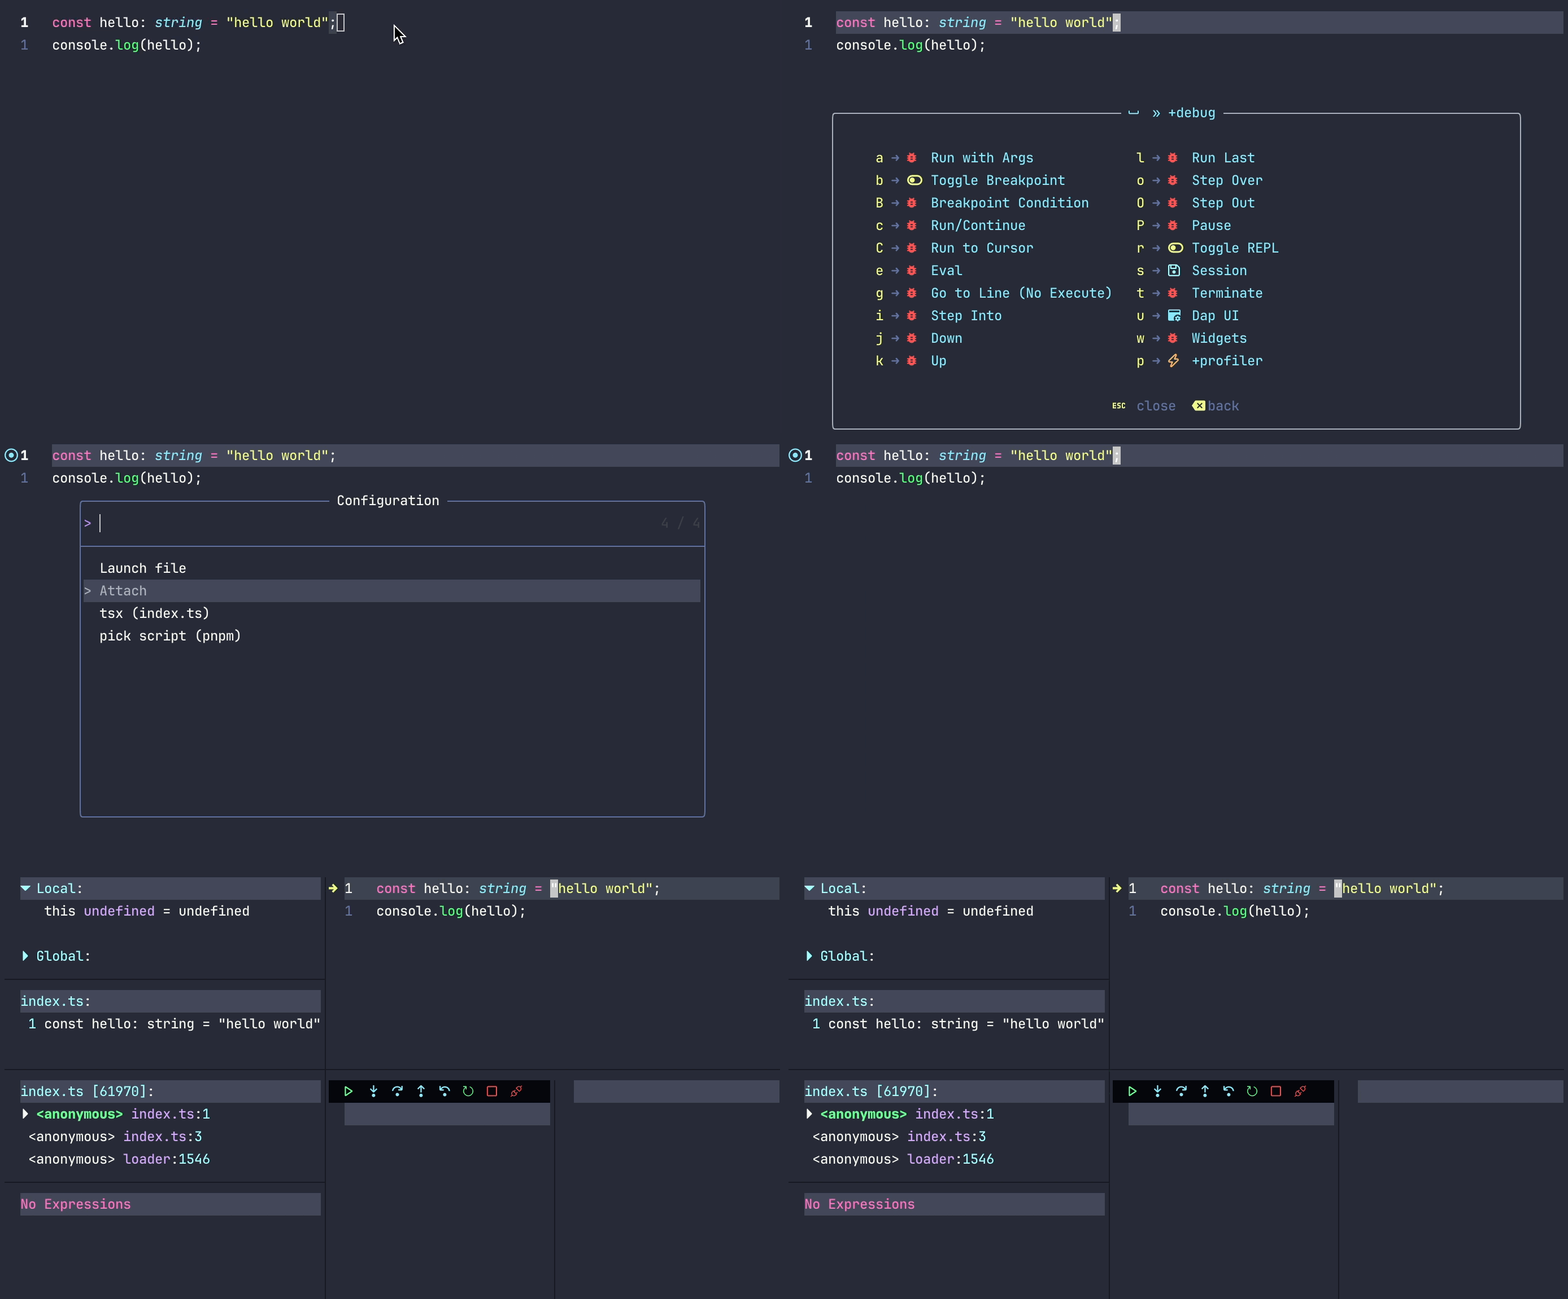
The Setup
Let’s start with saying that I am currently using LazyVim, and I am super happy with that. So this guide will mainly be applicable for those who do. And to be honest, most things work great out of the box. This is just some fine tuning on top of that, and some workflows that I myself use. But I will try my best to point towards to documentation to show how anyone that does not use LazyVim can get the same setup.
What I am basically saying is, I won’t get into the full setup of a neovim or the whole debugger in Neovim. I will use the LazyVim base and focus on the TypeScript and Node part.
You will also see that the code snippets I include as reference from LazyVim are not in my code examples, that is because LazyVim includes them by default and I don’t have to include them manually. But I will try to point out what is included by default and what is not.
The Bare Minimum
With LazyVim, we already get a great default for working with nvim-dap, which is the main plugin we will use to debug our Node application. LazyVim also setup the base of nvim-dap-ui, nvim-dap-virtual-text and some other plugins as default. All of the setup for those are documented here for those that are interested in copying the base needed. I won’t put too much focus on that.
LazyVim is divided into extras, and the TypeScript extra provides some other nvim-dap config that is necessary to make it work. This is the default one provided by LazyVim. Let’s use that as our base (you can read more about that here):
{
  "mfussenegger/nvim-dap",
  optional = true,
  dependencies = {
    {
      "williamboman/mason.nvim",
      opts = function(_, opts)
        opts.ensure_installed = opts.ensure_installed or {}
        table.insert(opts.ensure_installed, "js-debug-adapter")
      end,
    },
  },
  opts = function()
    local dap = require("dap")
    if not dap.adapters["pwa-node"] then
      require("dap").adapters["pwa-node"] = {
        type = "server",
        host = "localhost",
        port = "${port}",
        executable = {
          command = "node",
          -- 💀 Make sure to update this path to point to your installation
          args = {
            LazyVim.get_pkg_path("js-debug-adapter", "/js-debug/src/dapDebugServer.js"),
            "${port}",
          },
        },
      }
    end
    if not dap.adapters["node"] then
      dap.adapters["node"] = function(cb, config)
        if config.type == "node" then
          config.type = "pwa-node"
        end
        local nativeAdapter = dap.adapters["pwa-node"]
        if type(nativeAdapter) == "function" then
          nativeAdapter(cb, config)
        else
          cb(nativeAdapter)
        end
      end
    end

    local js_filetypes = { "typescript", "javascript", "typescriptreact", "javascriptreact" }

    local vscode = require("dap.ext.vscode")
    vscode.type_to_filetypes["node"] = js_filetypes
    vscode.type_to_filetypes["pwa-node"] = js_filetypes

    for _, language in ipairs(js_filetypes) do
      if not dap.configurations[language] then
        dap.configurations[language] = {
          {
            type = "pwa-node",
            request = "launch",
            name = "Launch file",
            program = "${file}",
            cwd = "${workspaceFolder}",
          },
          {
            type = "pwa-node",
            request = "attach",
            name = "Attach",
            processId = require("dap.utils").pick_process,
            cwd = "${workspaceFolder}",
          },
        }
      end
    end
  end,
}
When I say use it as our base, it will be included by default from LazyVim. You won’t see the code more in the following snippets.
Some things that occur in the snippet above:
- Ensure that the
js-debug-adapteris installed - Setup the
pwa-nodeadapter - Setup the
nodeadapter - Setup the
launchandattachconfigurations for some specific file types.
The Launch Configuration
A lot of things occur in the snippet above, but the most important part is the launch configuration. This is the configuration that will be used when we start the debugger. You can read more about the specification about that here. You might be familiar with using the debugger in VS Code, which usually helps you create a launch.json, which you can place in your repo. That way, VS Code (or whichever IDE you use that have support for debugging), can read the file and start debugging the same way.
In Neovim, we don’t have that luxury. By default it will not read the launch.json file from the current repo. At least not without LazyVim in this case. In the base dap-config, this snippet is included:
-- setup dap config by VS Code launch.json file
local vscode = require("dap.ext.vscode")
local json = require("plenary.json")
vscode.json_decode = function(str)
  return vim.json.decode(json.json_strip_comments(str))
end
Which also allows us to place a launch.json in our repo, and it will be read by Neovim. This is a great feature, and I highly recommend using it. It makes it easier to share configurations with others, and it is also a great way to keep the configuration in the repo.
Attach and Launch
There are two main types of configuration that is provided by default. The attach and the launch. This is a short explanation of what they do:
attach: This configuration is used when you want to attach to a running process. This is useful when you have a server running, and you want to debug it. You can attach to the process and start debugging. Usually to attach to a process, you need to run it ininspectormode. To do this in Node, start your server withnode --inspect. This will allow you to attach to it.launch: This configuration is used when you want to start a new process and debug it. This is useful when you have a script or an app that you want to debug.
Debugging with the Defaults
Let’s try to debug a simple script with the default configuration. We do not have support for TypeScript yet, so lets try it with JavaScript. Create a new file, index.js:
const hello = "Hello, World!";
console.log(hello);
We don’t need to create a launch.json as the default ones provided by LazyVim will be enough for now.
First, let’s create a breakpoint. Depending on your configuration in Neovim, you might do it different ways. The docs on how LazyVim sets it up is here, but I use the command <leader>db for debug breakpoint. You can also use the command :lua require('dap').toggle_breakpoint().
In my case, which is the default for LazyVim, it will be reflected on the left gutter with the light blue circle.
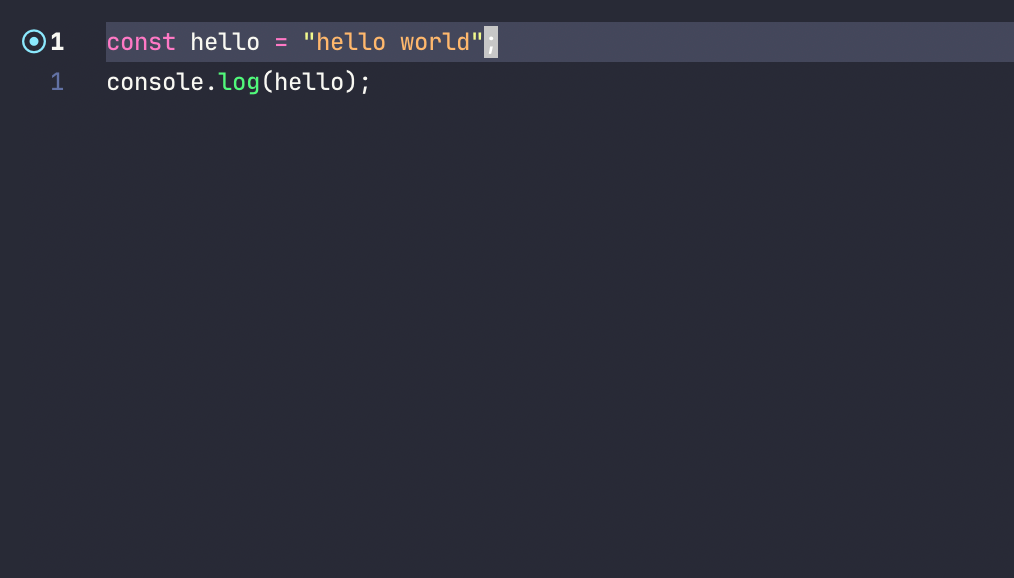
With this, I can simply run <leader>dc for debug continue, and the debugger will start. You can also use the command :lua require('dap').continue() to do the same thing.
This will show this fancy UI:
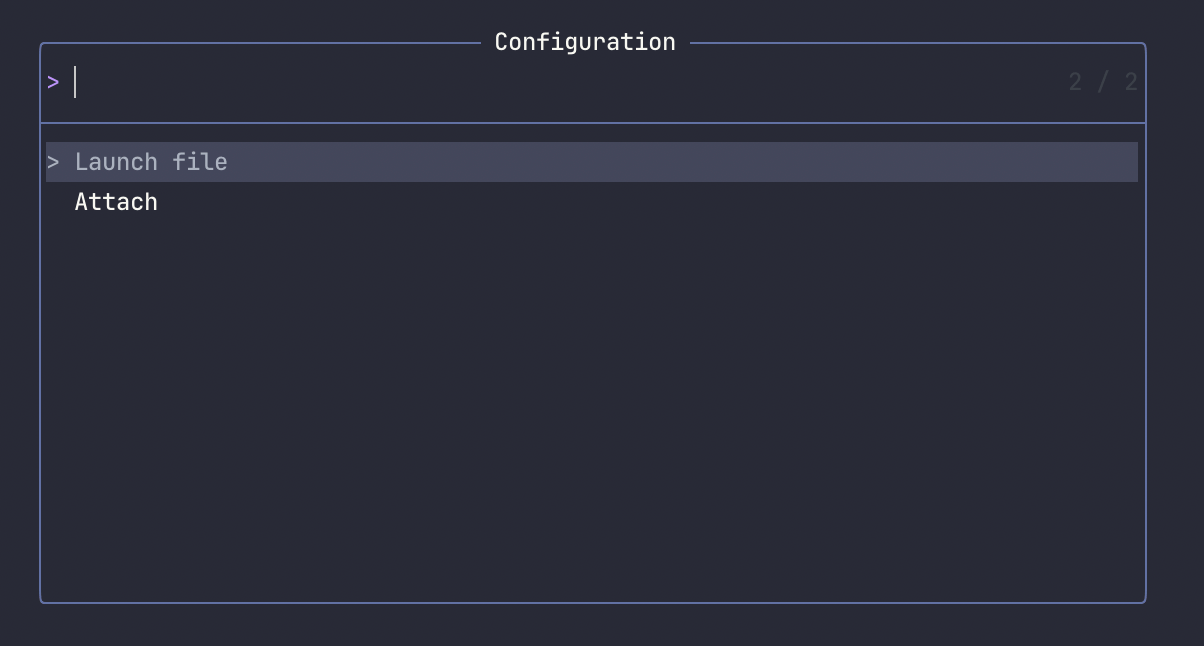
Which is the two default launch configurations we looked at earlier. Lets use the launch one and see what happens.
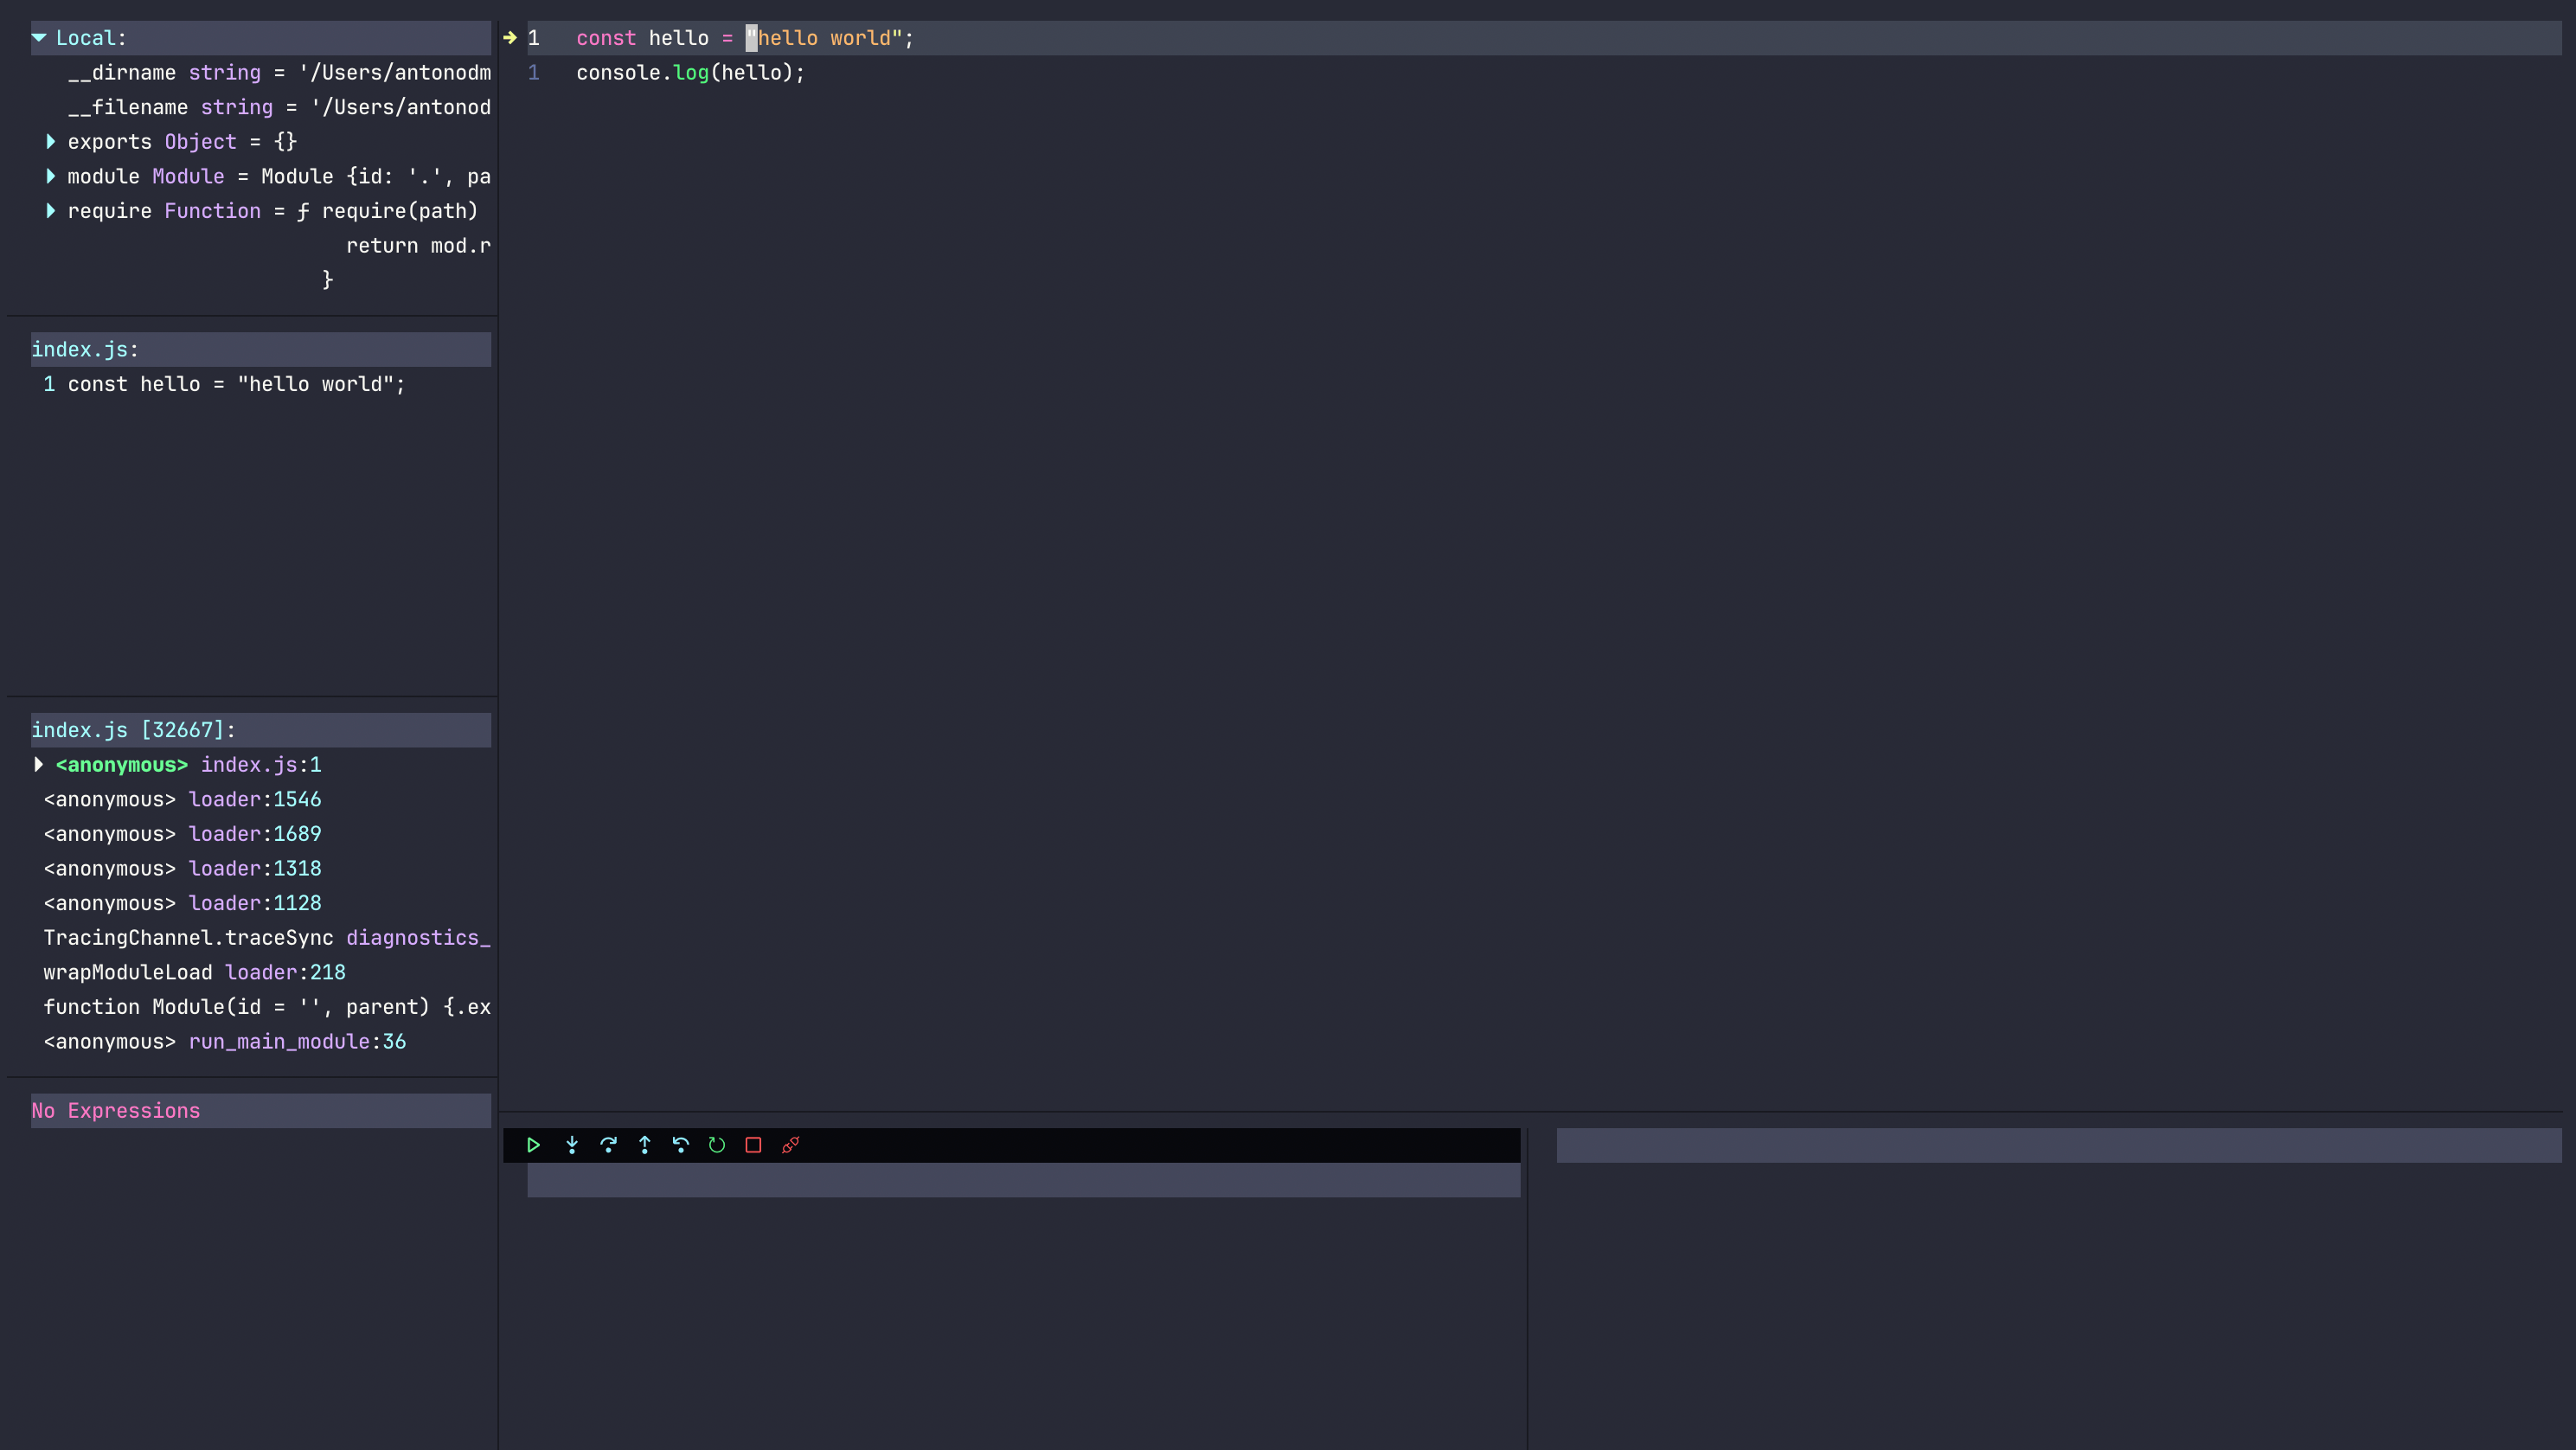
It seems to work (as indicated by the little arrow in the gutter). So JavaScript works out of the box. But what about TypeScript? Not quite yet.
Adding a launch.json for TypeScript
To add proper support for TypeScript, we need to add a launch configuration for TypeScript, and we need to make sure tsx is installed, as that is the runtime we will use to run TypeScript code. It can be installed with your preferred package manager for node, I tend to always have it installed globally for minor scripts.
npm install -g tsxWe can add a launch.json in two different ways:
- In the repo, in the following path:
.vscode/launch.json - In the nvim config (which we will do, because in that case you can use it for all your projects!)
The configuration we will use is quite simple, and directly copied over from the documentation of TSX.
{
    "name": "tsx",
    "type": "node",
    "request": "launch",
    "program": "${file}",
    "runtimeExecutable": "tsx",
    "console": "integratedTerminal",
    "internalConsoleOptions": "neverOpen",
    "cwd": "${workspaceFolder}",
    "skipFiles": [
        "<node_internals>/**",
        "${workspaceFolder}/node_modules/**",
    ],
}
By simply adding this this to your repo, it will more or less work directly. But we will add it into our Neovim config, so we can use it for all our projects.
Note: the
cwdattribute is not included in the documentation, but is important to run the debugger correctly. So make sure to include it.
In your Neovim config, in the configurations for nvim-dap, add the following:
-- ...
opts = function(_, opts)
  local dap = require("dap")
  local js_filetypes = { "typescript", "javascript", "typescriptreact", "javascriptreact" }

  local current_file = vim.fn.expand("%:t")

  -- Add new base configurations, override the default ones
  for _, language in ipairs(js_filetypes) do
    dap.configurations[language] = {
      {
        type = "pwa-node",
        request = "launch",
        name = "Launch file",
        program = "${file}",
        cwd = "${workspaceFolder}",
      },
      {
        type = "pwa-node",
        request = "attach",
        name = "Attach",
        processId = require("dap.utils").pick_process,
        cwd = "${workspaceFolder}",
      },
      {
        name = "tsx (" .. current_file .. ")",
        type = "node",
        request = "launch",
        program = "${file}",
        runtimeExecutable = "tsx",
        cwd = "${workspaceFolder}",
        console = "integratedTerminal",
        internalConsoleOptions = "neverOpen",
        skipFiles = { "<node_internals>/**", "${workspaceFolder}/node_modules/**" },
      },
    }
  end
end,
-- ...
What we did here was basically just add the new launch configuration (besides the default ones) for TypeScript. We also added the cwd to make sure it runs correctly. You can also see that I changed the name a bit, by adding the current file name. This is because it will try to run the current file whenever you run this command. Let’s change our file from index.js to index.ts and update the code.
const hello: string = "Hello, World!";
console.log(hello);
Now, if we run the debugger with <leader>dc, we can see that we have a new configuration available:
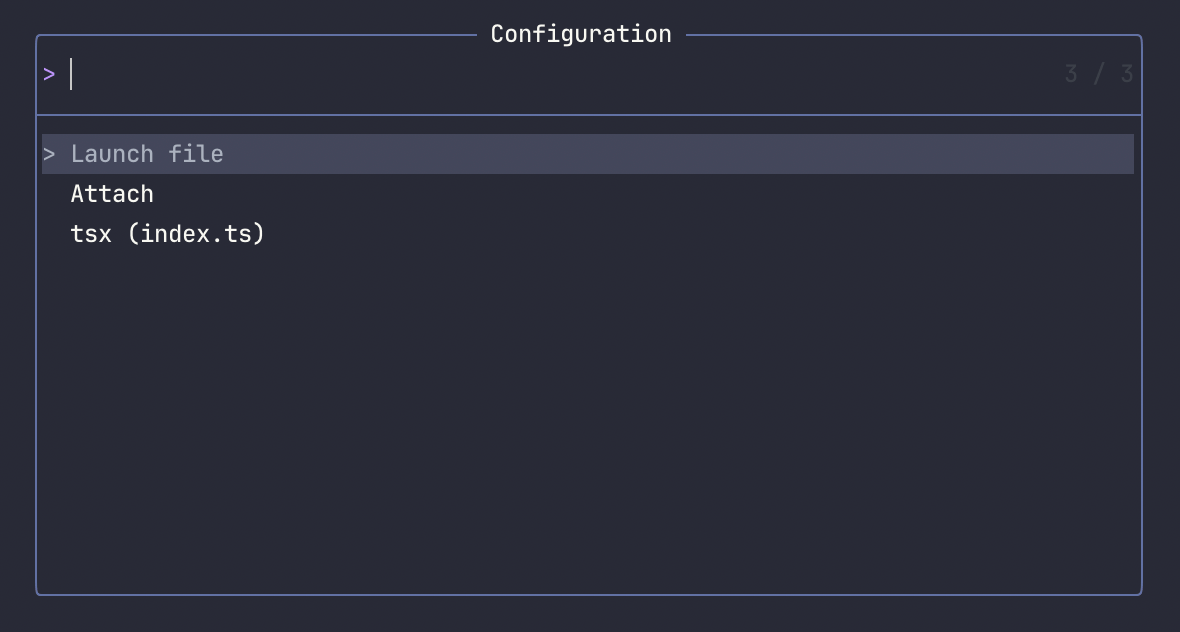
Let’s select it and see what happens.
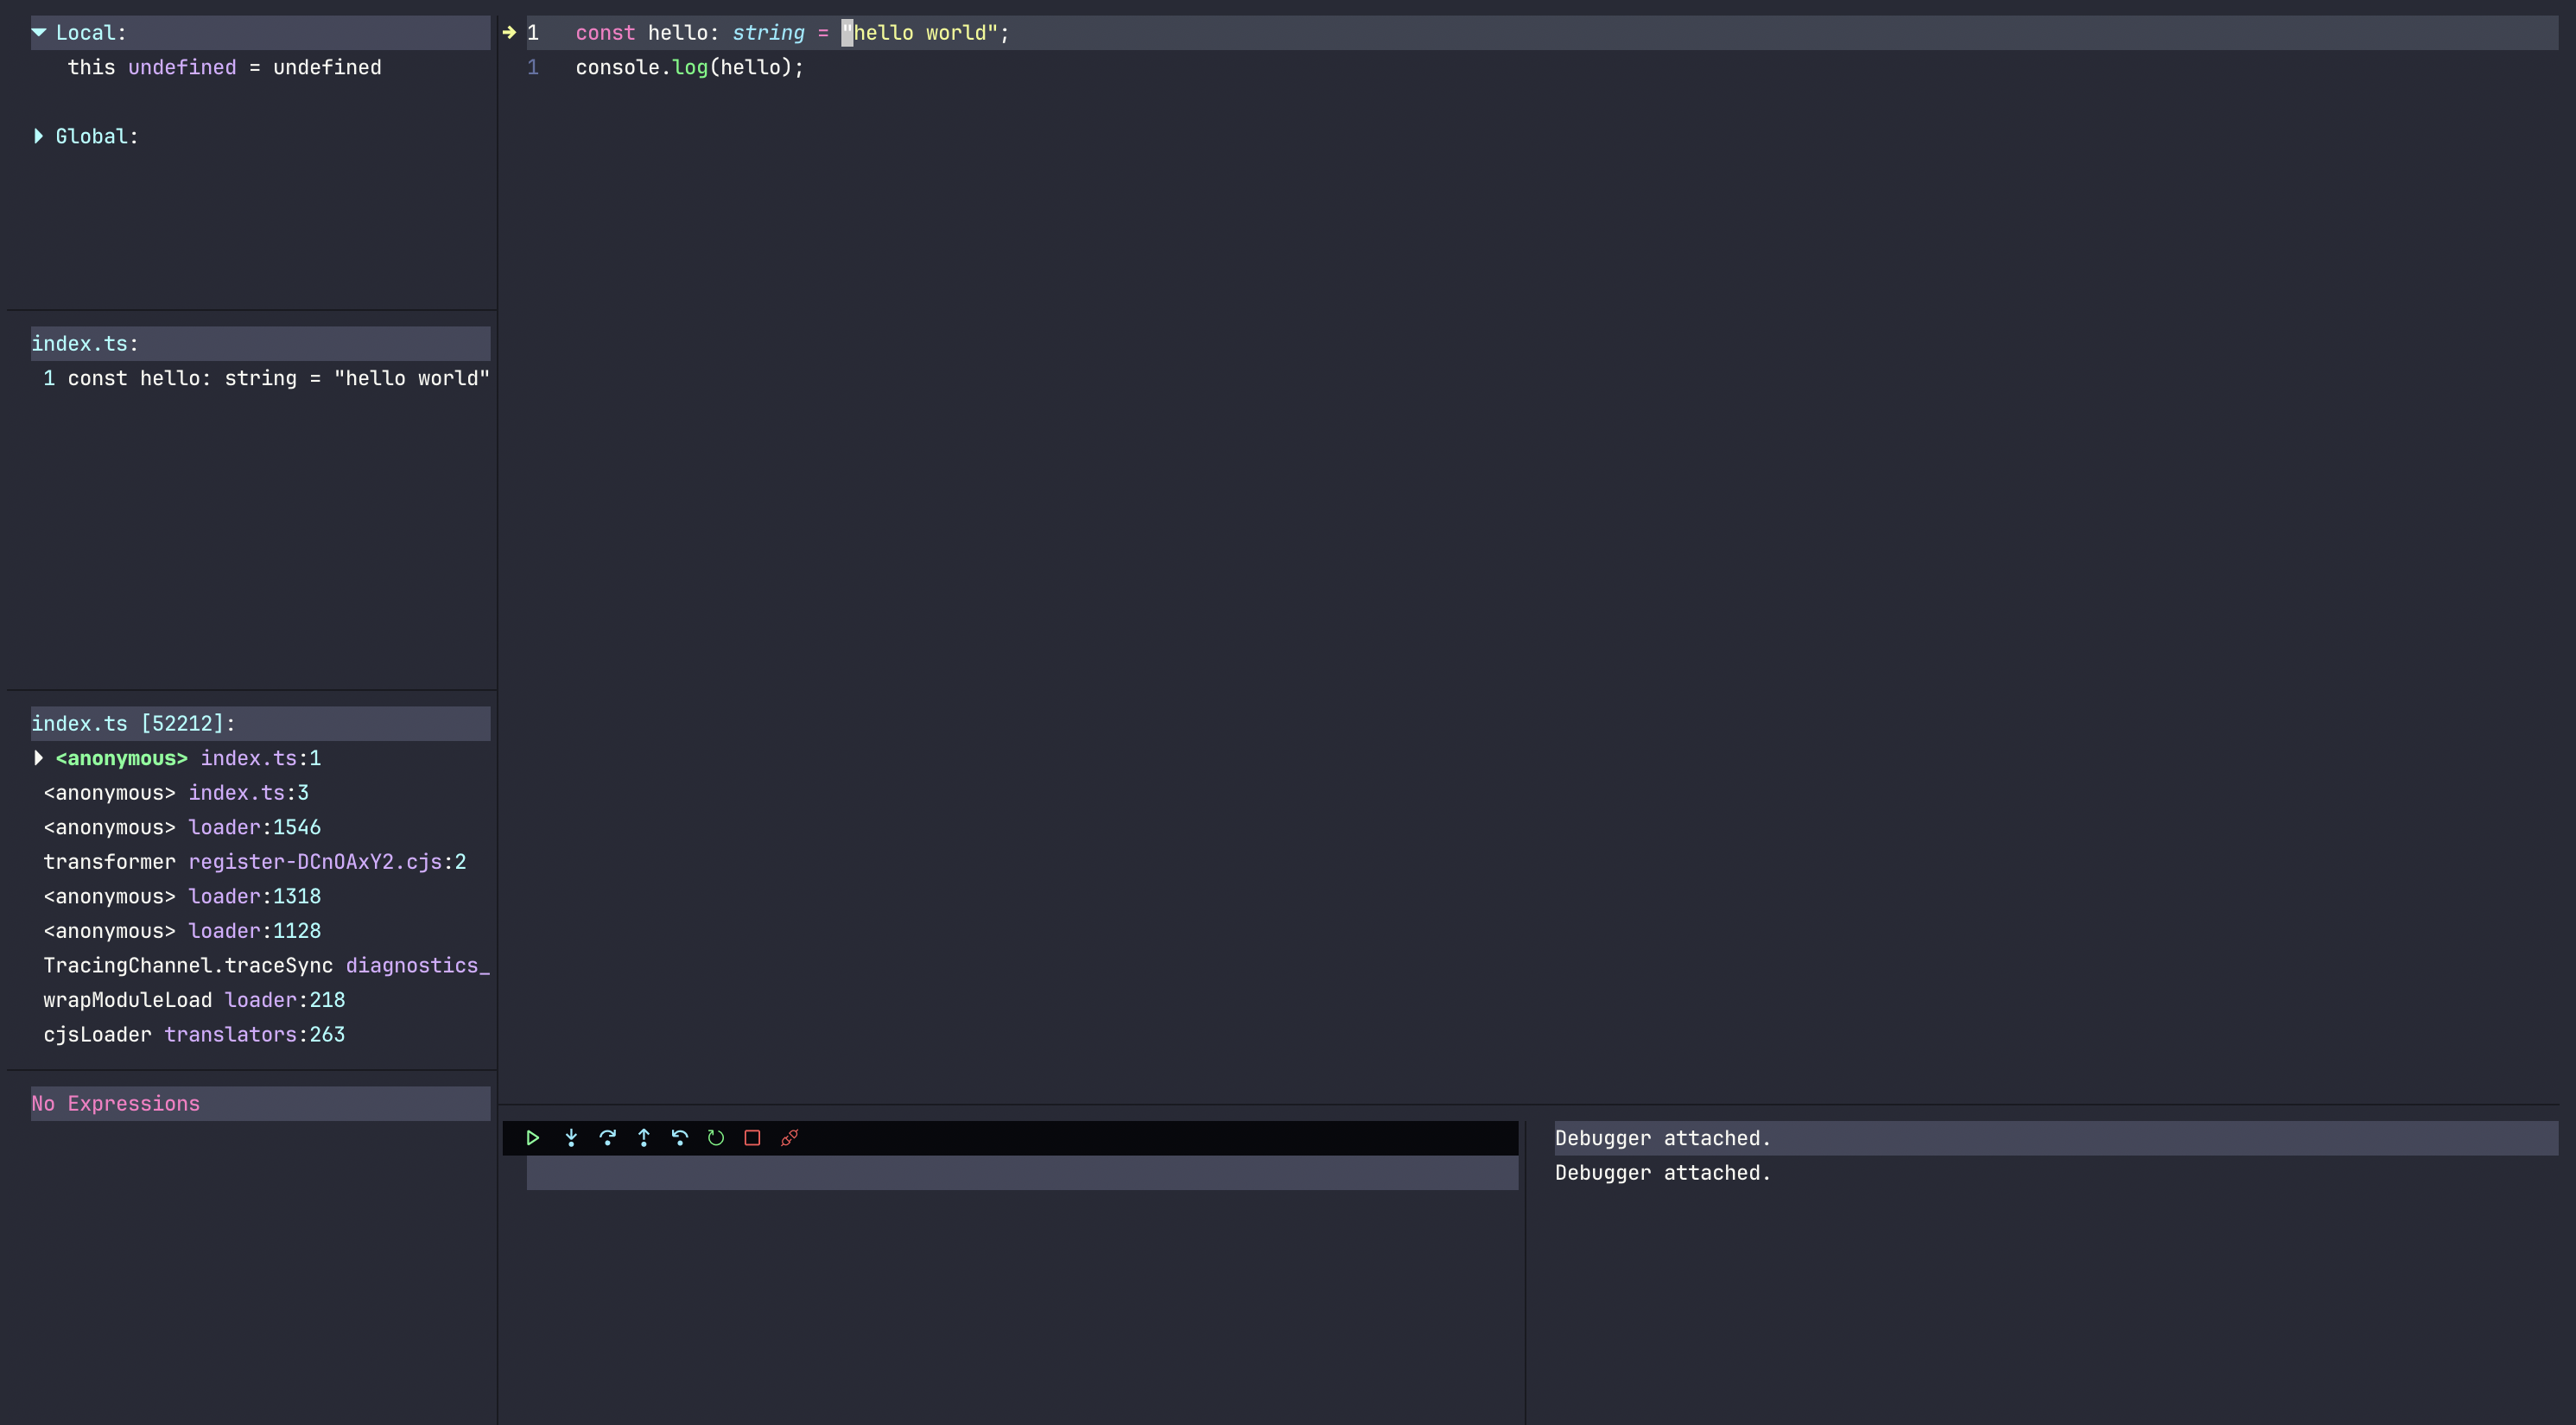
Woho, it works! 🎉 The debugger has stopped at the breakpoint.
Running with Scripts From package.json
The TSX configuration is used to run the current file, but usually you might want to start the debugger with a script from your package.json. It would of course be simple to just create a new configuration for a specific script, but let’s make it a little more dynamic.
Usually, we may have some sort of dev or start script we have to run the server which we want to debug. Let’s add a new configuration for selecting a script from the package.json and run that instead.
To do this, I have prepared a plugin we can use called package-pilot.nvim. It is just some simple plugins to find the nearest package.json and read all the scripts from that file. First, we need to include that plugin in the dependencies of nvim-dap. I use lazy.vim as a package manager, so I’ll import it like below. But you can use whatever package manager you use.
{
  "mfussenegger/nvim-dap",
  optional = true,
  dependencies = {
    -- ...
    {
      "banjo/package-pilot.nvim",
    },
  },
  -- ...
}
After that, let’s create a function that parses the closest package.json and let’s us select which script we want to run.
local function pick_script()
  local pilot = require("package-pilot")

  local current_dir = vim.fn.getcwd()
  local package = pilot.find_package_file({ dir = current_dir })

  if not package then
    vim.notify("No package.json found", vim.log.levels.ERROR)
    return require("dap").ABORT
  end

  local scripts = pilot.get_all_scripts(package)

  local label_fn = function(script)
    return script
  end

  local co, ismain = coroutine.running()
  local ui = require("dap.ui")
  local pick = (co and not ismain) and ui.pick_one or ui.pick_one_sync
  local result = pick(scripts, "Select script", label_fn)
  return result or require("dap").ABORT
end
What this basically does is:
- Find the closest
package.json - Get all the scripts from that file
- Let us select one of the scripts
- Return the selected script
You can either put the function within in the opts function, or above the whole lazy plugin setup. I will put it above the whole setup.
After that, we just need to create the new configuration. I’ll default to pnpm in this case as I use that for all my projects.
{
  type = "node",
  request = "launch",
  name = "pick script (pnpm)",
  runtimeExecutable = "pnpm",
  runtimeArgs = { "run", pick_script },
  cwd = "${workspaceFolder}",
}
After adding that, we can now select the new configuration and select a script from the package.json to run. Let’s try by creating a new package.json with a start script.
{
  "name": "test",
  "version": "1.0.0",
  "scripts": {
    "start": "tsx index.ts"
  }
}
And this is the result:

Smooth, right? 🚀
The Final Code
So, the final code should look something like this:
local function pick_script()
  local pilot = require("package-pilot")

  local current_dir = vim.fn.getcwd()
  local package = pilot.find_package_file({ dir = current_dir })

  if not package then
    vim.notify("No package.json found", vim.log.levels.ERROR)
    return require("dap").ABORT
  end

  local scripts = pilot.get_all_scripts(package)

  local label_fn = function(script)
    return script
  end

  local co, ismain = coroutine.running()
  local ui = require("dap.ui")
  local pick = (co and not ismain) and ui.pick_one or ui.pick_one_sync
  local result = pick(scripts, "Select script", label_fn)
  return result or require("dap").ABORT
end

return {
  "mfussenegger/nvim-dap",
  dependencies = { "banjo/package-pilot.nvim" },
  opts = function(_, opts)
    local dap = require("dap")
    local js_filetypes = { "typescript", "javascript", "typescriptreact", "javascriptreact" }

    local current_file = vim.fn.expand("%:t")
    for _, language in ipairs(js_filetypes) do
      dap.configurations[language] = {
        {
          type = "pwa-node",
          request = "launch",
          name = "Launch file",
          program = "${file}",
          cwd = "${workspaceFolder}",
        },
        {
          type = "pwa-node",
          request = "attach",
          name = "Attach",
          processId = require("dap.utils").pick_process,
          cwd = "${workspaceFolder}",
        },
        {
          name = "tsx (" .. current_file .. ")",
          type = "node",
          request = "launch",
          program = "${file}",
          runtimeExecutable = "tsx",
          cwd = "${workspaceFolder}",
          console = "integratedTerminal",
          internalConsoleOptions = "neverOpen",
          skipFiles = { "<node_internals>/**", "${workspaceFolder}/node_modules/**" },
        },
        {
          type = "node",
          request = "launch",
          name = "pick script (pnpm)",
          runtimeExecutable = "pnpm",
          runtimeArgs = { "run", pick_script },
          cwd = "${workspaceFolder}",
        },
      }
    end
  end,
}
Conclusion
I hope this guide makes some sense to you. It is very specific for LazyVim in this case, but hopefully it might perhaps guide you in the right direction. Feel free to reach out to me at Twitter/X if you have any questions or need help with anything. I am always happy to help.
You can also take a look at my current dotfiles here in case you need to peek at the full setup.
Happy debugging! 🎉